Managing Roles and Groups
Managing Roles
Roles are already pre-defined in the system (as part of the developer’s design) and there are already actions related to the role. To view these roles, click on User Groups from the main screen.
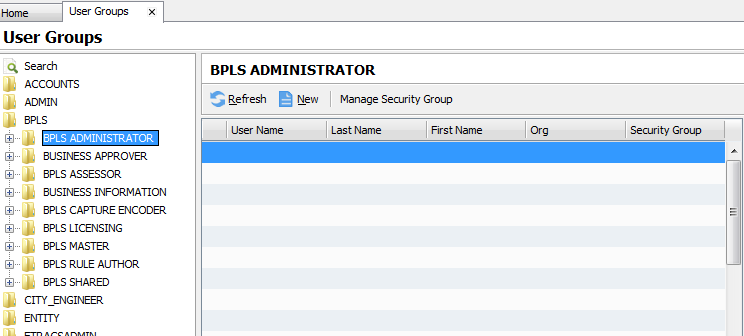
Figure 6 User Groups Management Screen
Managing Security Groups
Security group is new addition in version 2.5. This allows the user to customize permissions for a role. If the administrator is managing a huge organization, this grouping is a time-saver for users having same roles but different access permissions. There are two ways to create security groups. One is through User Groups and the other is by opening the record of the user and adding security groups from there. To add security groups, click the User Groups from the home screen. Select the Domain and select the appropriate role you want to create security groups for. (See image above). On the right pane of the window, click Manage Security Group. This should display the following screen:
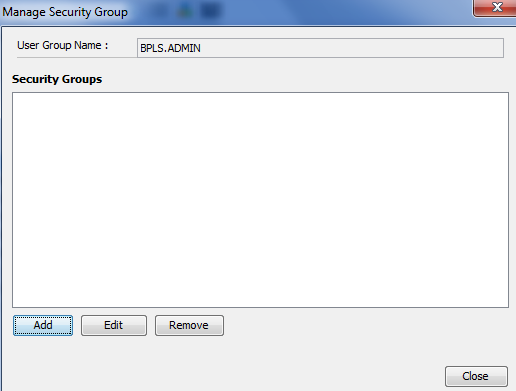
Figure 7 Security Group
Click on Add and enter a name for your security group. Then on the permissions, check or uncheck which are applicable. Click on OK to save this security group.
Managing Users
A user is someone who is registered in the system. A registered user can then be referenced in any transactions and processes. To be able to access the system a user must be authenticated and identified first by the system. To achieve this, users must have a username and a password. The username might be visible but the password must be private to the user. Only the admin can create users. To create a user Click on the Users in the home screen, then click New. This should display the screen below:
Creating User Accounts
Figure 8 New User Screen
The fields that are marked with * are required fields and must be filled up. The user txn code is a special code that is used in some parts of the system. This is a short text, preferably a user’s initial. If specified, this will appear as prefix in some transactions so the transaction will know it is prepared by that user. For example, in collection remittance, a numbering system that includes the user name is great because they can imimagestely pinpoint that remittance is created by that user.
Username must be unique so duplicates cannot occur. Once completed, the user info will be displayed.
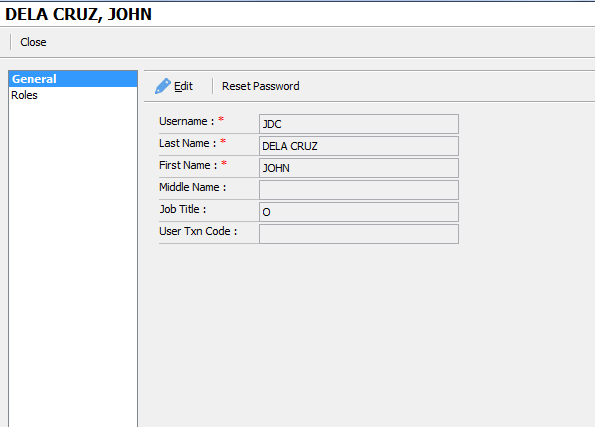
Figure 9 User Info screen
Assigning Roles
To add a role for the user, open the user record as above and click on Add button below.
Figure 10 Assign Roles Screen
On clicking Add, the following screen will show prompting you to add a role.
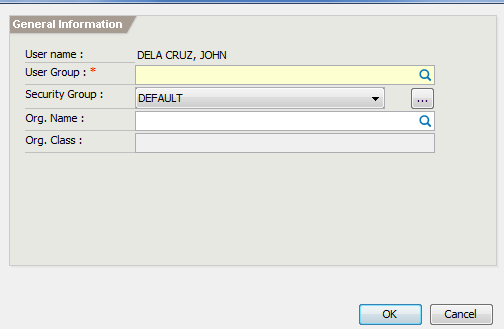
Figure 11 User group screen
User Name: refers to the name of the member.
User Group: A combination of domain and role.
Tip: To speed up
lookup, type the domain in the User group textbox then press enter.
Security Group: If specified, only the allowed permissions will be accessible.
Org Name: If specified, this authorization will only be applicable for the organization specified.
Customizing Permissions
ETRACS allows finer permission that is applicable on a per-user level. To do this, open the assigned usergroup for the user, then on the security group field, click the button to display the permissions for the security group. See screen below
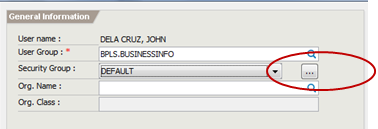
Figure 12 Customizing permissions
Reset Passwords
In case a user forgets their password, the admin is the only one who can reset it. ETRACS does not have a capability to recover passwords because password encryption cannot be reversed. To do this, login as admin and go to the Users Record, then click the Reset Password. Specify a password and let the user know the password you specified. Ask the user to login using their username and password specified. If successful, the system will prompt the user to provide another password.