Building Revision Setting
Building Revision Setting
This is the setting that controls the assessment computation of building property. Included are settings for Assessment Levels, Building Types, Building Adjustments and Computation Options. It is critical that the actual schedule values from the approve ordinance must be followed to avoid unnecessary administrative complications.
To create a new setting, on the Main Menu explorer, navigate and double-click Settings -> Assessor -> Building Revision Settings item.
On the list page, click on
Newto open the New Revision Setting page.
- Enter the Revision Year and click
Save. After successfully saving the record, the main screen is displayed.
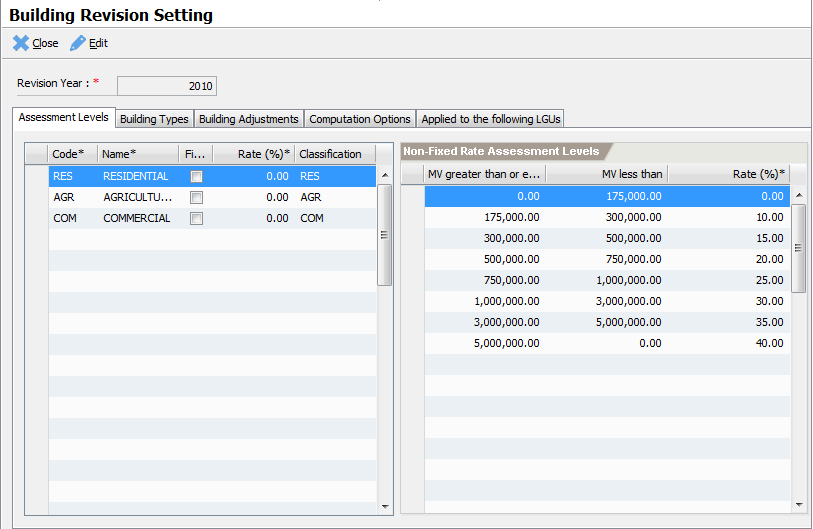
Assessment Levels
The Assessment Level tab defines all applicable assessment rates for each actual use. The rates are used to compute the assessed value of a property.
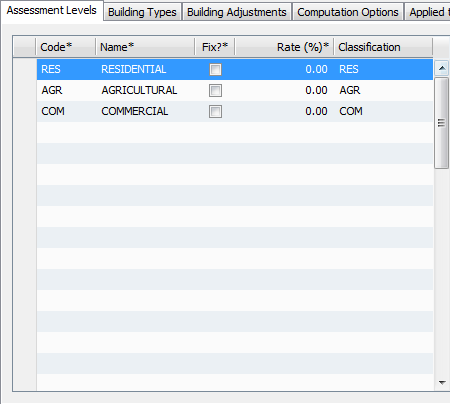
Adding a new Assessment Level:
Click on the “Code” column of the last empty row.
Enter the following information by moving from column to column:
Code – a required assessment level code
Name – a required assessment level name
Fix? – indicates whether the rate is a fix amount or based on a range of values.
Rate – the assessment level rate expressed as percentage
Classification – a lookup that references one of the standard property classifications
Commit the record by moving the cursor to the next row.
Assessment Level Ranges
In cases where the assessment level is not “Fix”, then range entries must be defined. The range is based on graduated market values with corresponding assessment rates.
To enter the assessment level ranges:
Click on the MV less than column of an empty row.
Enter the upper range value. If this is the last value, enter zero (0) as the max value. The zero value indicates infinite number. Pres Enter to commit the entry.
Enter the rate in percentage and then press Enter.
Move the cursor to the next row to commit the record.
Repeat steps 1-4 and enter all ranges.
Building Types and Building Unit Construction Costs
Building Type classifies building according to a well-defined characteristic such as structures and construction materials used. A building type is also composed of several kinds of building. Each kind of building is associated with a corresponding base unit construction cost.
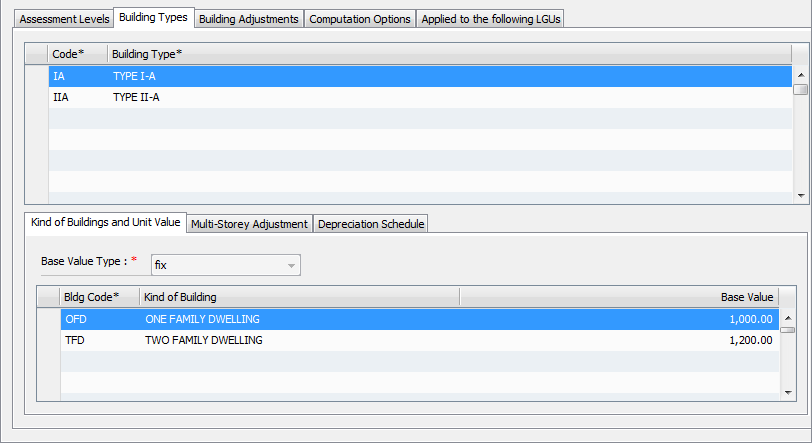
Entering Building Types:
On the building type list, click on the Code column of the first empty row.
Enter the following information:
Code – a required building type code such as I-A
Building Type – a required building type name such as Type I-A
After entering the Building Type name, press Enter to commit the item.
Repeat steps 1 – 3 to enter all building types.
Entering Kind of Buildings and Unit Value:
Select the Building Type into which to add the different kinds of building and its corresponding unit value.
On the Kind of Building and Unit Value tab, select the Base Value Type. The base value type can either be fix, range or gap.
Click on the Bldg Code column in the first empty row of the building kind and unit value list.
Lookup the kind of building such as One Family Dwelling
If the base value type is fix, then enter the Base Value otherwise enter the Minimum Base Value and the Maximum Base Value.
Move the cursor into the next row to commit the item.
Repeat steps 1 - 6 to add all kinds of building and its unit value.
Multi-Storey Adjustments
The multi-storey adjustment is use to adjust the base value depending on floor location. The value must be expressed in percentage and it reduces the base value by this percentage.
To add Multi-Storey Adjustment:
Select the Multi-Storey Adjustment Tab
Click on the Floor No. column of the first empty row.
Enter the following information:
Floor No. – the floor no.
Rate – the rate applied for the specified floor
After entering the rate, press
Enterto commit the item.Repeat steps 1 – 4 to add all storey adjustments.
Depreciation Schedules
The depreciation schedule defines the setting for automatically computing the depreciation of a building. Depreciation is also defined as per building type.
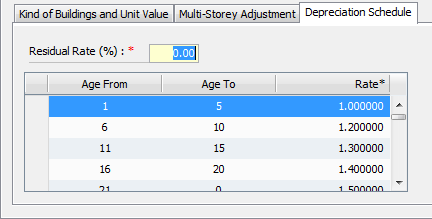
To add depreciation:
Select the Depreciation Schedule tab.
Click on the Age From column of the first empty row.
Enter the following information:
Age From – the start year for this range
Age To – the end year for this range
Rate – the applicable depreciation rate per year within the range
After entering the rate, press
Enterto commit the item.Repeat steps 1 – 4 to add all depreciation rates.
Building Adjustments
Adjustments applicable on a building include items such as Balcony, Toilet and Bath and etc. These adjustments are identified and its computation defined within the local revenue code.

To add building adjustments:
- On the Building Adjustments tab, click on
New.
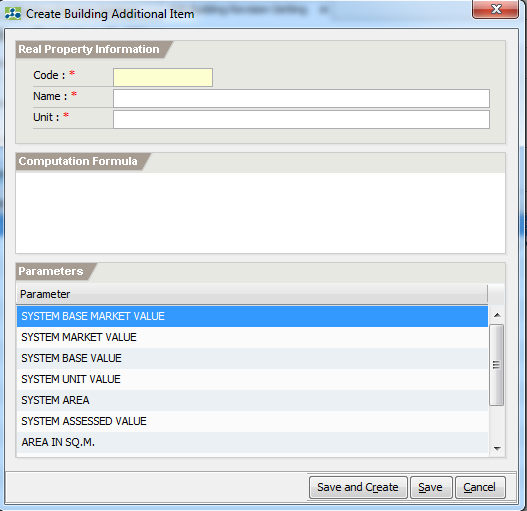
Enter the following information:
Code – a required adjustment code
Name – a required adjustment name
Unit – applicable unit for the adjustment
On the computation formula, enter the formula to compute the adjustment. To use a parameter, double click the parameter from the Parameters list to insert its parameter name.
Click Save to commit the record or
Save and Createto commit the record and create a new one.
Computation Options
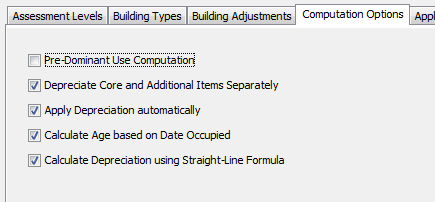
This tab defines settings that control the computation behavior of the system. The settings are:
Pre-Dominant Use Computation – if check, the system will calculate the assessed value based on the pre-dominant classification of the building. Otherwise, assessed value is computed per actual use.
Depreciate Core and Additional Items Separately – if check, the depreciation rate is calculated only against the base market value, therefore excluding the additional items or adjustments.
Apply Depreciation automatically – if check, the depreciation is automatically computed based on the depreciation schedule and applied on the computation.
Calculate Age based on Date Occupied – by default the building age is computed based on the date completed. If this option is checked, then the age is computed based on the date occupied.
Calculate Depreciation using Straight-Line Formula – if check depreciation is computed using straight line formula.
Applied to the following LGUs
ETRACS now supports cases where different revision settings are applicable to specified LGUs. Inorder for a setting to be useful, the LGUs must be added to the list. Use the Search LGU field to lookup and add and LGU to the list.