Data Capture - Land
Data Capture - Land
When a new system is implemented, the very first operation to be done is to capture existing records into the system. This is the process of encoding the information and performing the necessary transactions to match the current state of the document being captured.
Note: For LGU's with existing computerized real property assessment, migration of data might be possible. However, thorough data analysis must be done to fully evaluate if the existing data has the necessary requirements for the ETRACS system to process it completely and accurately.
When starting from scratch, it is recommended to capture all land properties first before entering the records for buildings, machineries, plants/trees and miscellaneous properties. This is necessary since the encoding of improvements require that the land record is already available.
To capture an existing FAAS record, open the Main Menu explorer.
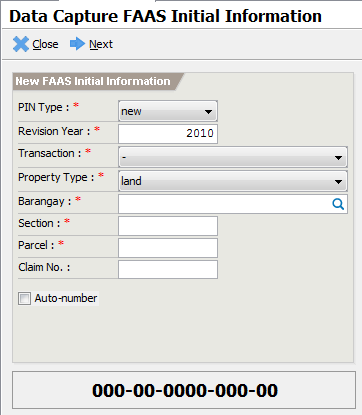
Double-click on the Transactions -> Assessor -> Manual Support -> Data Capture item or by accessing the Quick Launcher using the code DC01. This will display the Data Capture FAAS Initial Information screen.
Enter the following information:
PIN Type – valid values are new or old. The new pin type format is 000-00-0000-000-00 while the old pin format is 000-00-000-00-000.
Revision Year – the general revision year to capture
Transaction – the type of transaction for the FAS to capture
Property Type – the type of property either land, building, machinery, plant/tree or miscellaneous.
If the property type is land:
Barangay – lookup the barangay of the FAAS to capture
Section – the section no. of the FAAS to capture
Parcel – the parcel no. of the FAAS to capture
Claim No – the claim no (if applicable)
Auto-number – normally uncheck. Used only in cases where capturing is renumbered.
Validate that the manual PIN No. matches the generated PIN No.
Click Next to open the FAAS main screen.
The FAAS Main Screen
The main screen captures the basic FAAS information. The information are editable depending on the type of transaction under process. For data capture, all required data must be supplied.
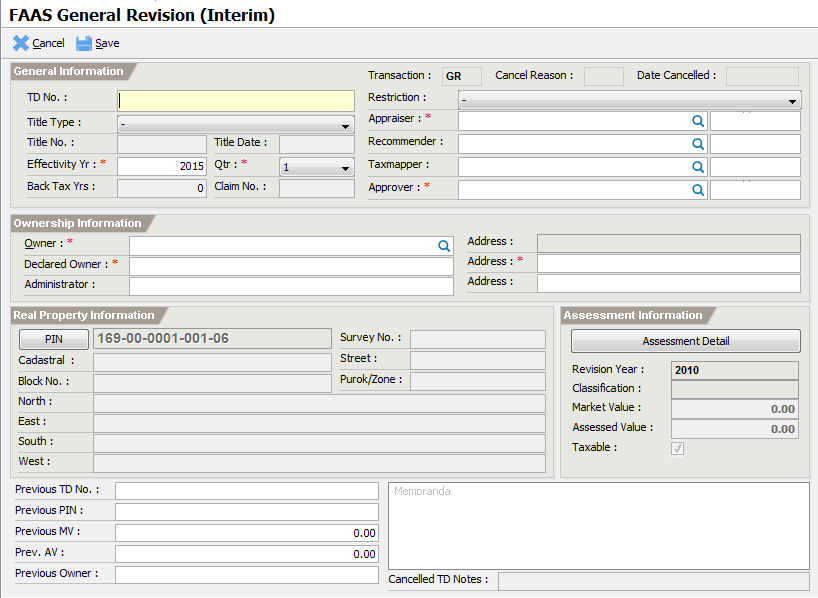
Enter the FAAS information based on the manual FAAS record. Make sure that all required data are supplied.
Verify that the encoded data are correct.
Click on the
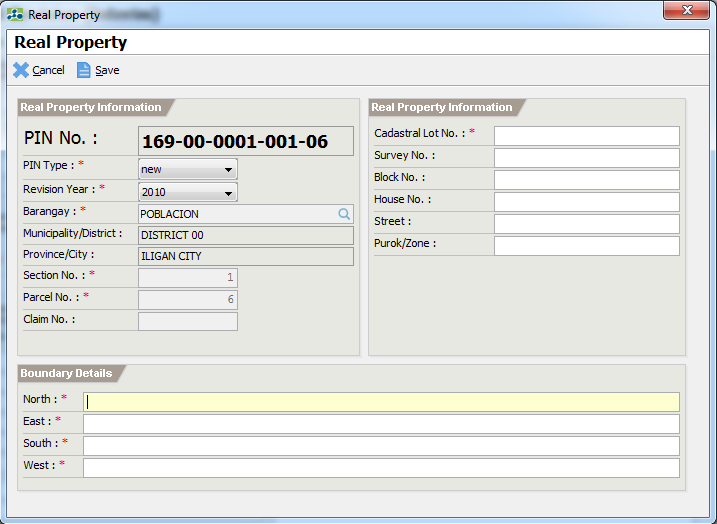
PINbutton to open the real property page shown below:
Enter the real property required information namely: cadastral lot no and the boundaries.
Click
Saveand thenCloseto return to the FAAS main screen.Click on
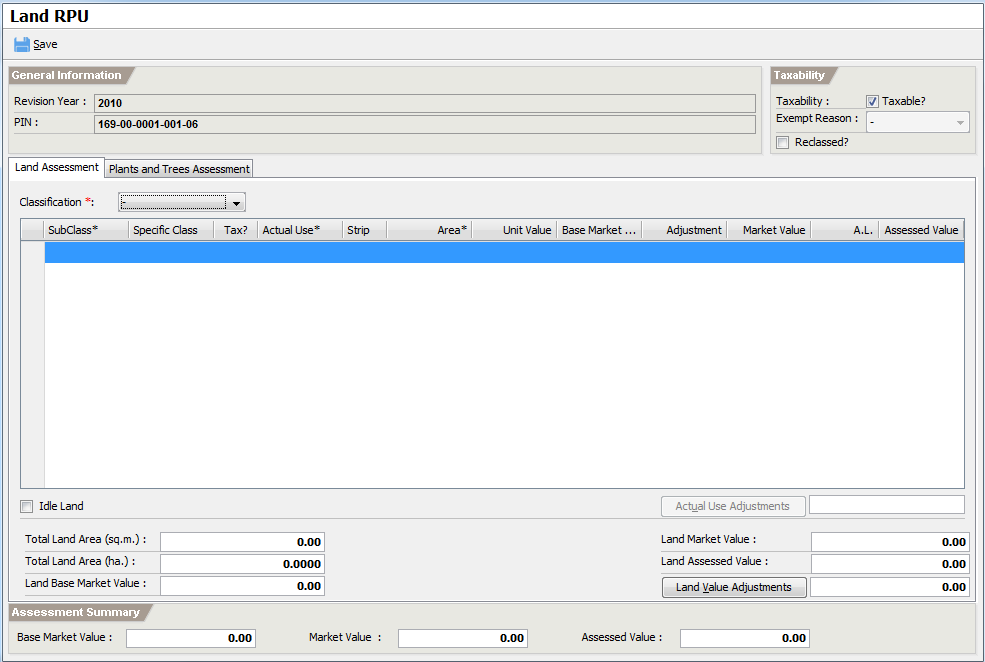
Assessment Detailto open the main RPU screen below:
Select the classification of the land from the Classification combo box.
Add the land actual use on the land assessment list:
Click on the Subclass column of the first empty row.
Enter the following information:
Subclass – lookup the land subclass to reference.
Tax? – must be checked if the item is taxable
Actual Use – lookup the actual use to reference. The actual use controls the assessment level to use in the computation.
Strip – lookup the stripping (if applicable)
Area – enter the area of the item
Verify that the Assessed Value is correct. If the setting faas_datacapture_allow_edit_av is set, then the assessed value can be modified to match the manually computed value.
Move the active row into the next row to commit the item.
Repeat steps a-d to add any land item.
If land adjustments are specified, click on
Land Value
Adjustments
to open the adjustment screen.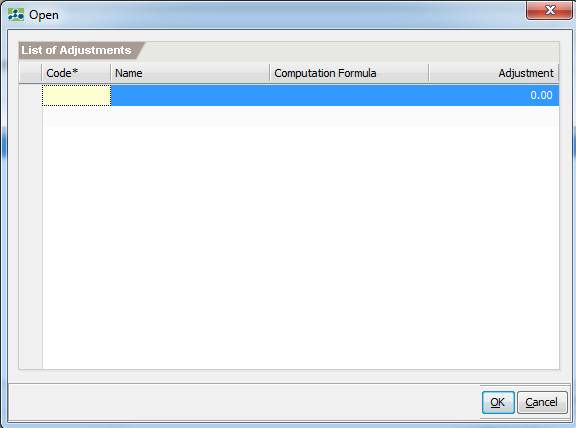
Click on the Code column of the first empty row.
Lookup the adjustment to add and supply any parameters required.
Move the active item to the next row.
Click on
OKto close the screen.
If there are Actual Use Adjustments, click on
Actual Use
Adjustments
to open the adjustment screen.Click on the Code column of the first empty row.
Lookup the adjustment to add and supply any parameters required.
Move the active item to the next row.
Click on
OKto close the screen.
Verify that the computations are correct.
Click on
SaveandCloseto return to FAAS main screen.Click on
Saveto commit the FAAS record.Click on
Submitto forward the FAAS record for approval.
Click on Approve to approve the FAAS record.
