Managing Rules
Managing Rules
Starting from version 2.5, the rule authoring interface is standardized so that each rule author from different business domains will have a similar interface. For better management, rules are organized into groups known as rulesets. Rulesets are sets of rules for a certain function or area where rules are to be applied. For example business assessment, rpt billing and business billing are different rulesets. To view this in the system go to Main Menu > Rule Management. Under this would be the domain, and rulesets for each domain are displayed. See diagram below:
To manage these rulesets, position the mouse to the specific ruleset and double click to open the list of rules for the ruleset. See diagram below:
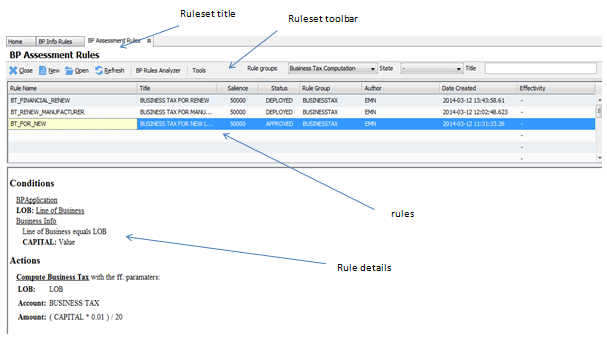
The Ruleset title shows the ruleset name. The toolbar contains some actions to manage rules:
Close – closes the window
New – creates a new rule
Open – Opens the selected rule from the list
Refresh – refreshes the list if new rules are added in case the new rule does not appear in the list
Analyzer – shows the analyzer or tester for the rules. The analyzer is ruleset specific which means there is another analyzer for another ruleset.
Tools – miscellaneous intended for use for developers
Rule Groups – shows the rulegroups for this particular ruleset. Selecting a rulegroup shows the rules under the certain rule group. Rule groups are discussed further in Rule Groups section.
State – shows which rules are draft, deployed, or approved. Draft means rule is still not finished. Deployed are active rules while approved are approved rules but not deployed.
Title – search facility based on title
Tools – displays a drop down menu of support functions. Of particular importance is the Reload function. In case there are errors when authoring rules.
The rule list view shows a listing of the rules that match the filter above. It shows the following columns – name of rule, title, the salience or priority of execution, the status, the rulegroup associated, the rule author, date created and effectivity date. The highlighted line is the selected line. The details of the selected line is shown below the list. The rule details show the information regarding the rule.
To open a rule, select or highlight a rule then double click the mouse or click on the Open button from the toolbar. This will open the rule info screen. The English-like expression is displayed to be easily understandable.
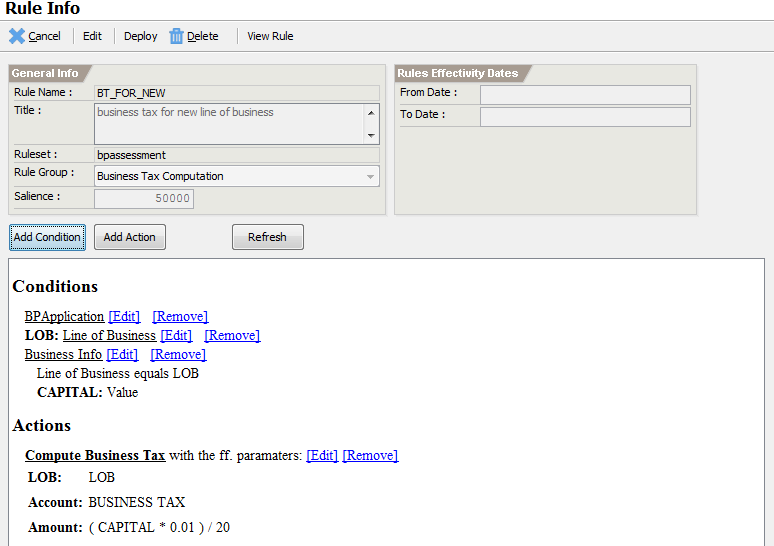
Figure 21 Rule Info
Adding a new rule
To add a new rule, click on New from the Rule List View. Specify the rule name and description of the rule. The rulegroup can be changed. Rule groups determine which section or compartment in the rule engine it will execute. (For more about rule groups, go to Rule Groups section).
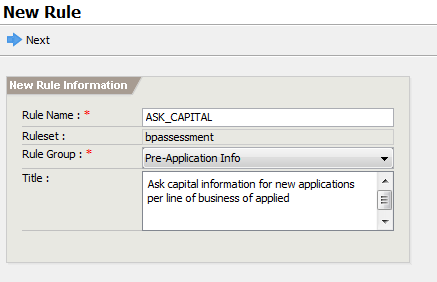
Specify the rule name, rule set and rule group and a short description
of what this rule does. The rule name does not accept spaces in between
so it automatically adds an underscore instead of spaces. The rule name
must be unique within the ruleset. Click Next when completed. This will
imimagestely save this rule in the database and displays the rule
authoring screen.
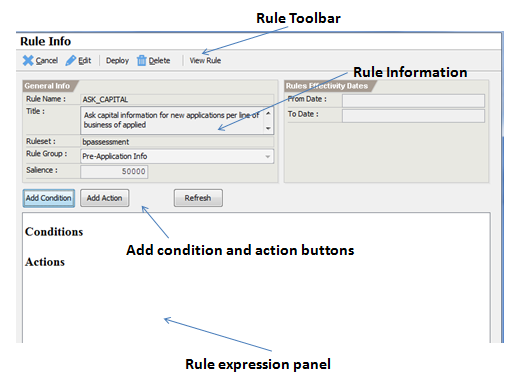
Figure 22 Rule Authoring Screen
The Rule Toolbar contains functions for the rule authoring screen.
Edit –is used for editing the general info, i.e. the ruleset, rulegroup , salience and effectivity dates.
Deploy - is used to activate the rules. Unless the rule is deployed, the rule will not take effect.
Delete – is used to permanently delete this rule. If the rule is deployed, then it cannot be deleted. Undeploy first before deleting.
View Rule – is used to view the generated rule. This is used for debugging support.
The rule authoring buttons include the following:
Add Condition – adds a new condition
Add Action - adds a new action
Refresh – In case the rule does not reflect on the expression panel, click on refresh
Adding Condition
To add conditions, click on the Add Condition button. Select a fact from
the available list and click Next.
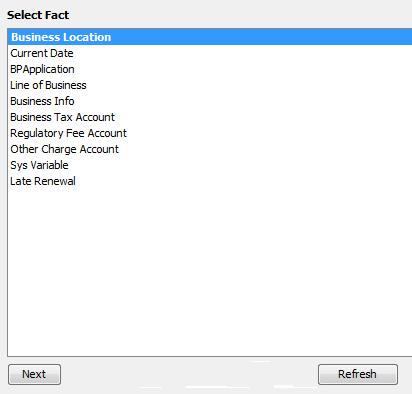
Next step is to build constraints from the fact selected. If you want to
reference this fact in other constraints or actions, specify a variable
name. This can be any name you can assign. To add a constraint click on
the Add link.
This will display a list of fields within this fact. Select a field used for the constraint. The criteria will depend on the type of data of the field. For example, if the field chosen is a Boolean (true or false) then the criteria will be limited to true or false type of entries, if decimal or integer, it will display number values and conditions, for lookups, it will show a lookup screen.
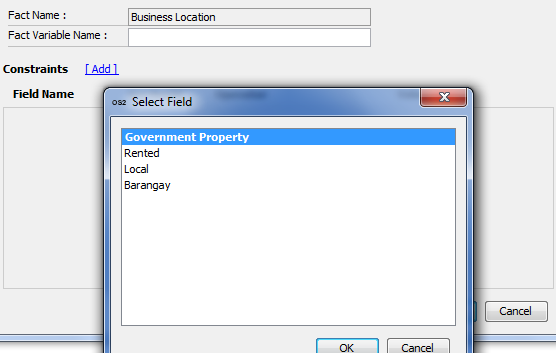
After selecting the fields, you can now set the constraints. A constraint consists of the fieldname, an operator for comparing, and the constraint value. The operator is dependent on the data type of the field i.e. a Boolean field will have a different operator for numbers like decimal and integer.
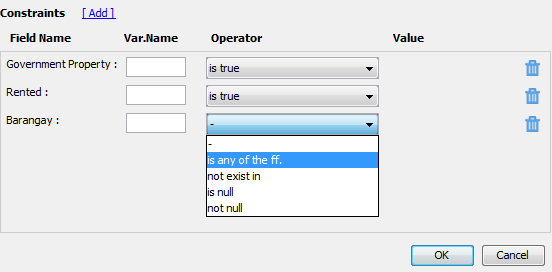
You can add as many constraints. You can also add fields which you can
assign a variable name to so it can be used in the succeeding constraint
or action. If you made an error and you want to remove the constraint,
just click on the
so it can be removed. Once you have finished completing the constraints
click OK. The result will show in the rule expression panel.
You can remove this constraint by clicking the Remove link. To edit the
constraint, click Edit.
Add Actions
To add actions, click on Add Action button. Select an action from the displayed list. Click next when completed.
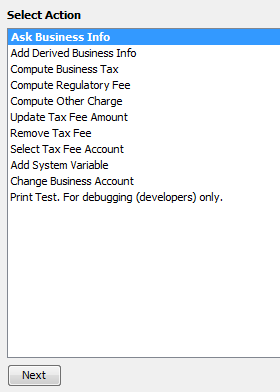
The parameters of the action depends on the type of action selected. For example for computation type of actions, a formula field is displayed.
The amount in this example can be expressed as a formula or as a table. A formula field enables you to write formulas for computing the value. To open the formula editor click on the fX button.
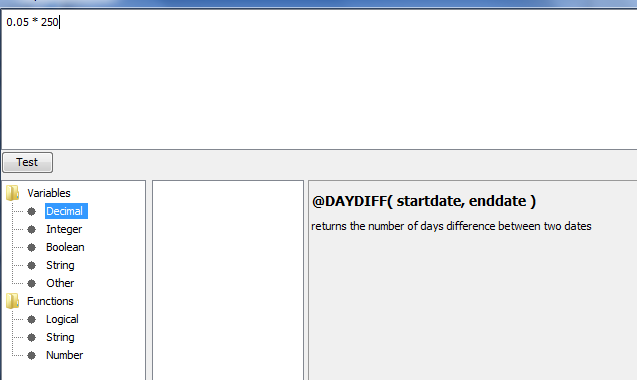
To provide more expressive formulas, you can even write short scripts
called groovy scripts. The groovy scripting engine is an open-source
scripting language for java. You can use variables declared in the
condition part included in your formula. When action is completed, press
OK to save the formula. At this point, when everything is complete, you
can deploy the rule.
Testing
You need to test the rules so that you will not have problems later. To check, go to the rule list view and see if there is an analyzer attached. If there is, then this rule can be tested. The following an example of the Business Assessment Rule Analyzer. Because analyzers or simulators are specific to the domain, it will not be discussed here.
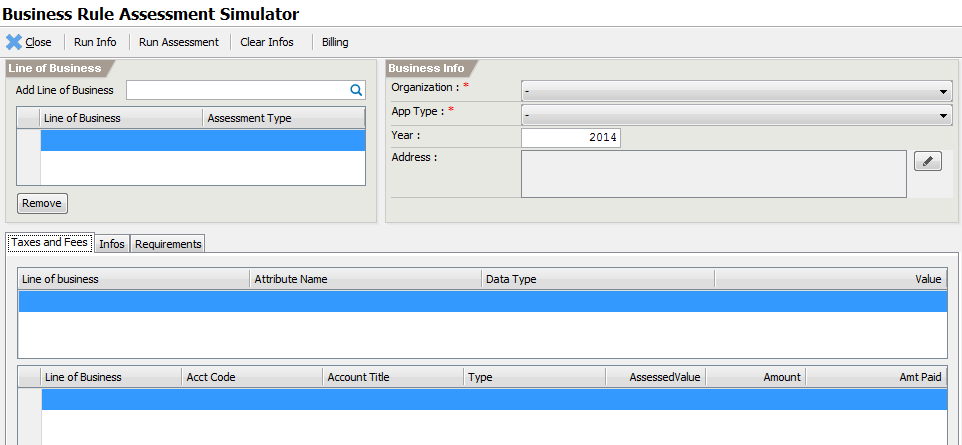
Figure 23 Example Rule Analyzer
Handling Errors
There are instances when errors occur that causes all other rules to not execute properly. It is sometimes caused by not well constructed rules which was not handled properly by the system. In this case, the entire ruleset cache must be cleared and reloaded. To do this, go the rule view list and click on Tools.
Click on the reload button and wait for a few seconds to reload the ruleset. This may take time depending on the number of rules deployed. A message will be displayed indicating the process was completed.
Summary
This section introduced the rules and general usage of the rule interface. The next chapters will discuss each of their specific rules and their application.